Let's do as the pros do and add a background image but first we must learn how we can position background images within a HTML element, using CSS.
 Steps to Success
Save an image
- Right mouse on the image below
- Save image as bg.gif in the images folder inside the webworkshop folder

- Open a new file in Notepad and add the following code
/* CSS document */
This is a CSS comment. It will help you know which file is the css and which file is the html. - Save the file as background.css in the mod04 folder
- Open a new file in Notepad
- Add the following markup:
<!DOCTYPE html PUBLIC "-//W3C//DTD XHTML 1.0 Strict//EN" "http://www.w3.org/TR/xhtml1/DTD/xhtml1-strict.dtd">
<html>
<head>
<title>Using Background Images</title>
</head>
<body>
<h1>Heading Background </h1>
<p>This is a web page that uses a background image in the body and h1 selectors </p>
<p>This is a 2nd paragraph</p>
</body>
</html> - Save as background.html
- Link to external style sheet, background.css in the <head> element using the following markup:
<link href="background.css" rel="stylesheet" type="text/css" />
Background Images and the Body Tag
We'll begin by looking at the syntax and then move onto the different options that are available to us. Let's begin with a simple rule for the body element that is shown in Illustration 1.
- Add the following background image rule to the external style sheet background.css
- Add the following background image rule to background.css
- Add the following (in red) to background.css
- Add the following (in red) to background.css
- Add the following (in red) to background.css
- Change the following (in red) in background.css
/* CSS document */
body{
margin:0;
padding:0;
background-color: #FFFFFF;
color: #ff0000;
background-image: url(../images/bg.gif);
background-repeat: no-repeat;
background-position: right;
}Illustration 6: Using no-repeat
- Change the following (in red) in background.css
- Change the following (in red) in background.css
- Right mouse on the image below

- Save image as xhtml_h1_bg.gif in the images folder inside the steps folder.
- Add the following code (in red) to background.css
Create a new css
Create a new web page
/* CSS document */
body{
margin:0;
padding:0;
background-color: #FFFFFF;
color: #ff0000;
background-image: url(../images/bg.gif);
}
Illustration 1: Adding a background image to our body 
Image 1: The default setting
Our body rule in Illustration 1 produces what you see in the image above, and can
generally be taken as the browser default settings. We have
supplied no specific information from our style sheet other than the fact we
want to use a background image. How that image is to be used we have left to
the browser, at least to one degree or another.
/* CSS document */
body{
margin:0;
padding:0;
background-color: #FFFFFF;
color: #ff0000;
background-image: url(../images/bg.gif);
background-repeat: repeat;
}
Illustration 2: Background repeat
If we take the rule from Illustration 2 and preview it in our browser we will see
the result is identical to that shown in Image 1. In Illustration 2 we have told
the browser how we want our background image handled, rather than relying on
the browser to do it for us.

Image 2: Setting the image to repeat
In each of the above cases, our background image is a dark blue 50px square. The
CSS in Illustration 2 has tiled the image at our request, in Illustration 1 the browser
simply tiled it because that is what it does by default.
Tiling an Image in the "X"
I'm sure you will have heard that expression before, but if you're new to CSS I'll explain what it means and how we can implement it. I would guess that the most common reason designers would implement this type of rule would be when they required a banner to run the width of the page.
/* CSS document */
body{
margin:0;
padding:0;
background-color: #FFFFFF;
color: #ff0000;
background-image: url(../images/bg.gif);
background-repeat: repeat-x;
}
Illustration 3: Tiling in the "X"
You will notice that our background-repeat rule has grown slightly in Illustration 3, we have added the following to the repeat section: -x. This tells the browser that we only want our image to repeat from left to right, this is the "X" plane.
Preview in a browser will give the results as shown in Image 3.

Image 3: Tiling in the "X"
As we can see, our image is now tiled from left to right, and is only one row tall.
Tiling in the "Y"
This is similar to tiling in the "X", instead of creating a horizontal banner, tiling in the "Y" creates a vertical bar.
/* CSS document */
body{
margin:0;
padding:0;
background-color: #FFFFFF;
color: #ff0000;
background-image: url(../images/bg.gif);
background-repeat: repeat-y;
}
Illustration 4: Tiling in the "Y"
Preview in a browser will give the results as shown in Image 4.

Image 4: Tiling in the "Y"
Background Positioning.
The default is to begin repeating the image on the left edge of the body, as we can see from our tiling in the "Y" example. We never declared a position in our CSS, and this placed the vertically repeated image in the default position, the left hand side. If you are still supporting Netscape 4 you should be aware that this browser does not support the positioning property.
/* CSS document */
body{
margin:0;
padding:0;
background-color: #FFFFFF;
color: #ff0000;
background-image: url(../images/bg.gif);
background-repeat: repeat-y;
background-position: right;
}
Illustration 5: The background-position property
As you can see, we have added our background-position property to our body rule .
Preview in a browser so we can see how this alters the display of our page.

Image 5: Tiled in the "Y" and positioned
Neat! We can see that by using the background-position property we have been able to move our column from the default position on the left of our page to the right of our page. In all the examples we have used to date, we have been repeating our background image. This is not necessary. What if we want display a single image within our page at a specified location?
Preview our revised body rule .

Image 6: Using the no-repeat property
Maybe not entirely what you expected, as the image is right aligned but it's slap bang in the middle. Not to worry, that can easily be changed. Let's examine the following code listing.
/* CSS document */
body{
margin:0;
padding:0;
background-color: #FFFFFF;
color: #ff0000;
background-image: url(../images/bg.gif);
background-repeat: no-repeat;
background-position: top right;
}
Illustration 6: Setting dual values in the position property
You will notice our background-position property has changed. We are now using two options within the positional portion of our CSS, top and right. We can see the results of this in Image 7 below.

Image 7: Positioning our image to top and right
Let's look at an alternative method of positioning our image; let's try % values.
/* CSS document */
body{
margin:0;
padding:0;
background-color: #FFFFFF;
color: #ff0000;
background-image: url(../images/bg.gif);
background-repeat: no-repeat;
background-position: 25% 75%;
}
Illustration 7: Centering our background image
With our background position set to 50% 50%, we are able to center our image in the browser window, regardless of viewport size. We can also vary this position by making adjustments to the % values. Try making some adjustments yourself and see what results you can achieve.
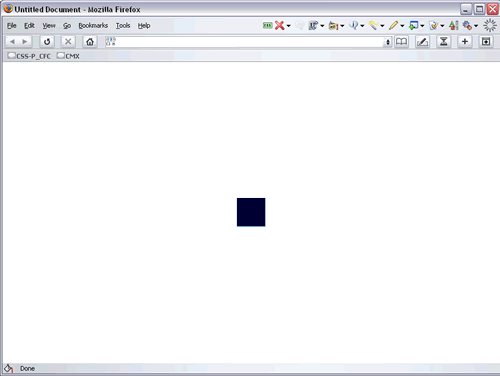
Image 8: Centering our image in the browser window
While we have concentrated our efforts on the body tag, using background images is by no means only restricted to this tag. We can apply them anywhere. The use of background images can enhance your design and they are so very easy to implement with CSS.
Adding a background image to an h1 tag.
/* CSS document */
body{
margin:0;
padding:0;
background-color: #FFFFFF;
color: #ff0000;
background-image: url(../images/bg.gif);
background-repeat: no-repeat;
background-position: 25% 75%;
}
h1{
color: #FFFFFF;
font: bold 2em Arial, Helvetica, sans-serif;
padding-top: 14px;
background-color: #990000;
background-image: url(../images/xhtml_h1_bg.gif);
background-repeat: repeat-x;
background-position: bottom;
padding-bottom: 30px;
padding-left: 20px;
}
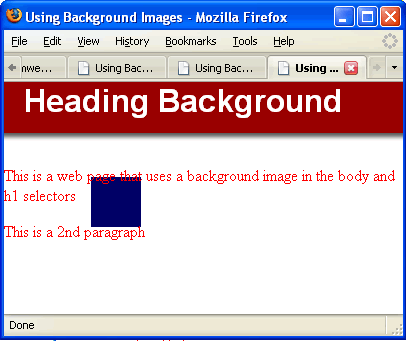
Note: The h1 has a padding-bottom value that with the background-position bottom, moves the image at the bottom of container. The drop shadow appears below the content.
Save and preview in a browser.
Conclusion
In this tutorial, we have seen how we can implement a background image into the body and h1 tag of the web page. We have looked at the repeating options we have, and we looked at how we can prevent repeating our background images when necessary. CSS is a powerful tool. It gives us global control of our web site elements.
Next we'll put that power to use and create an illusion using a background image and CSS